Data Content Planner
Overview
Data Content Planner is a visual tool for data content planning and population based on the selected blueprint. Data Content Planner helps people responsible for the data to maintain records and links according to the blueprint. Planned data content instances are called data content sets.
A Data content set consists of
- A blueprint model, which includes the blueprint containers & relationships loaded from the selected blueprint version.
- A Record landing zone icon for each blueprint container, where content set items are required.
- Desired record icons for the creation of new desired records.
Creating a new Data Content Set
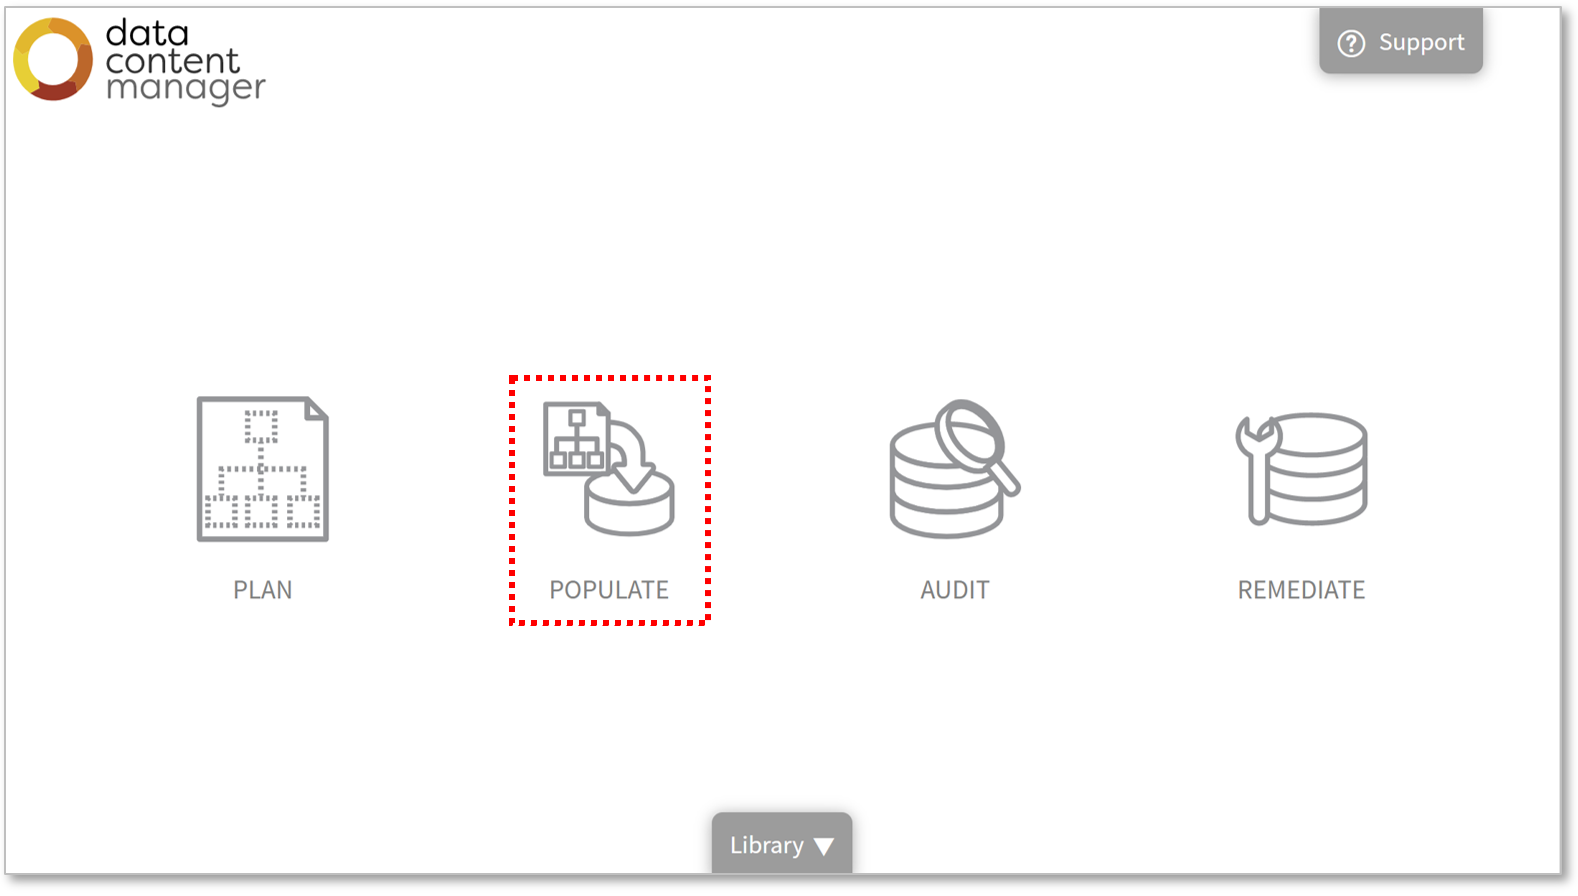
- Go to the DCM main page and select "New Data Content":
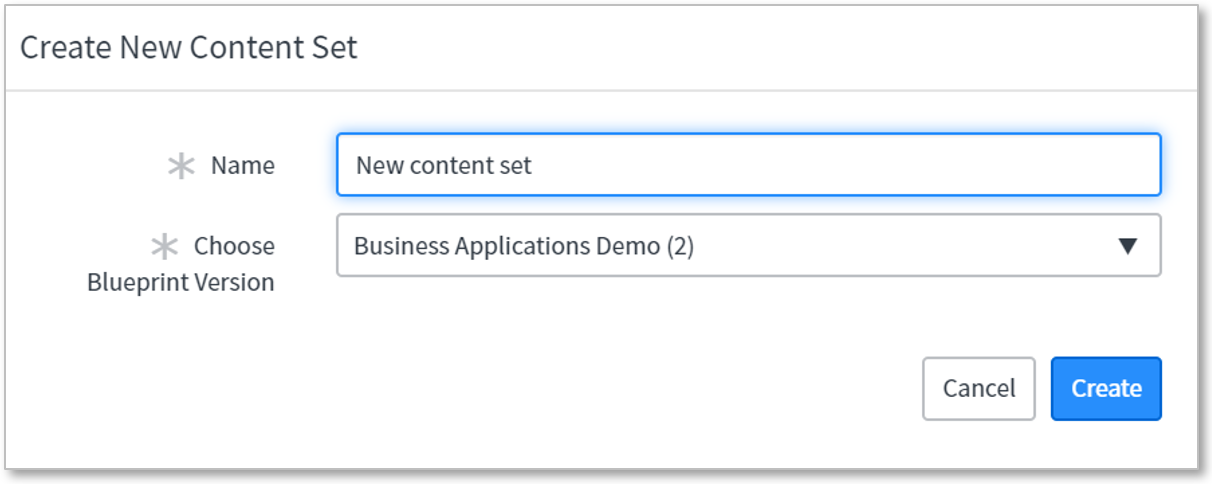
- In the Create New Content Set window, add a name, select a blueprint version and click the "Create" button.
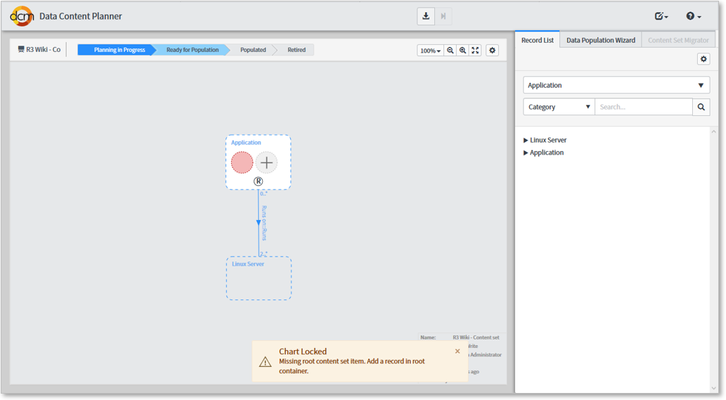
- A new data content set opens up, and you can start to define new data content based on and according to the selected blueprint version.
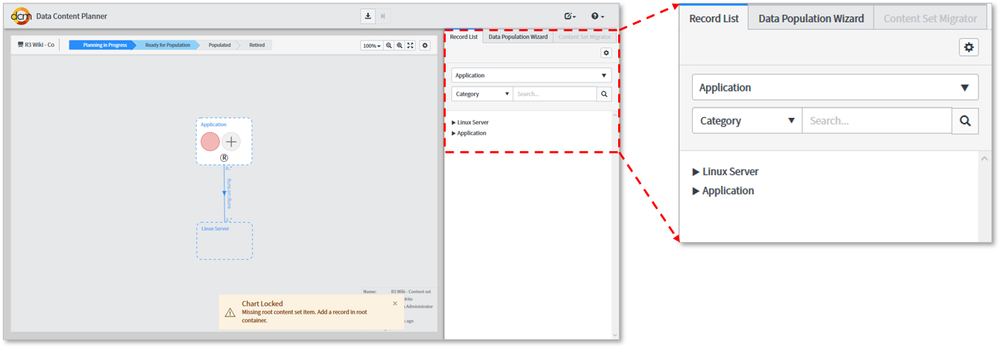
- Content creation always starts from the Root record, so only the Root container is enabled while other containers are locked.
Canvas area can be moved by dragging the mouse while holding down the space bar.
Adding content set items
A Content Set Item is either an existing record or a desired record that comes attached with a blueprint container.
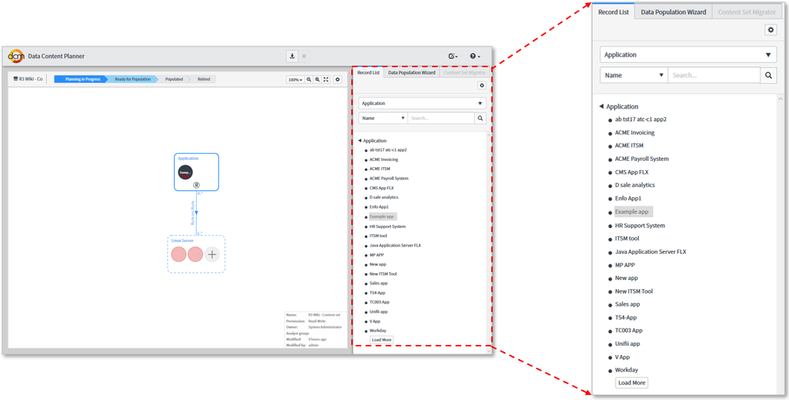
The record list menu shows any current, existing records that match with the blueprint's classes and blueprint container conditions:
Example
If there is a class "Linux server" added to the blueprint with a condition which defines that the record's Location field value must be either "Finland" or "Sweden", the record list shows only those records in the table "Linux Server" that match with the blueprint container's conditions
The user has two options to expand the record list view:
- By selecting the expand icon on the record list.
- By selecting the blueprint container box in the drawing pane. E.g. if a user selects the "Application" blueprint container, the Application record list will expand automatically and the Record list only shows records for that class. If a record is already on the canvas, it's highlighted with a gray background on the record list.
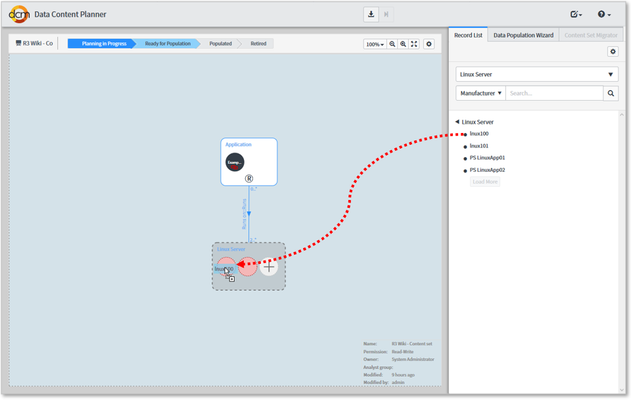
After the needed record has been found, the user can drag & drop the record to the correct blueprint container.
DCM allows the user to add matching records only. The data content planner indicates the allowed blueprints by color-coding.
For the Root container, only one record is allowed.
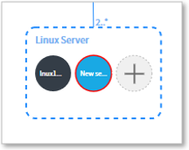
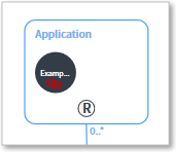
The added records are shown inside the blueprint container as black circles. Any added desired records (planned, currently non-existing records) are shown as blue circles.
Adding relationships
The red link icon inside the circle indicates that the content set item (a record) is missing at least one mandatory relationship.
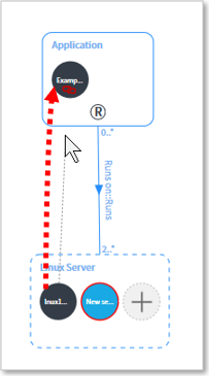
Relationships between records are created by drawing a line between the records in two different containers.
- Press SHIFT + DRAG from one record to another
- After the line is drawn, the blueprint in the background will dictate what kind of relationship is actually used when populating the data into actual tables.
Deleting Content Set Items
When removing items from a content set we are not really deleting any data from the system. Therefore "deleting records" is more about removing them from a content set rather than actually deleting records from the database.
Removing records from a content set
Removing records from the content set can be done in two different ways:
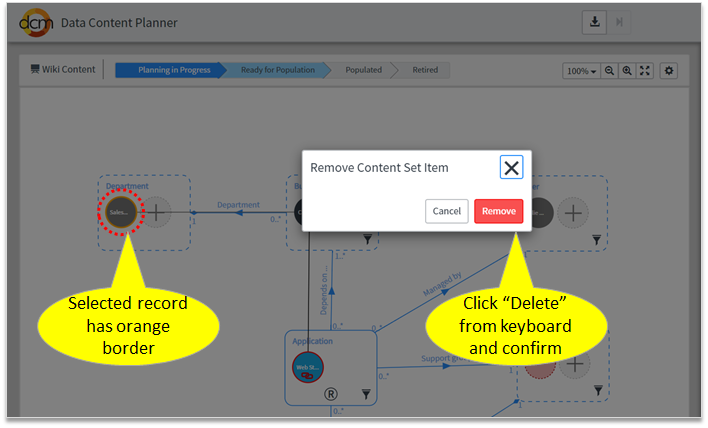
- Select a record or link and click "Delete" from the keyboard
- And confirm deletion on the prompt
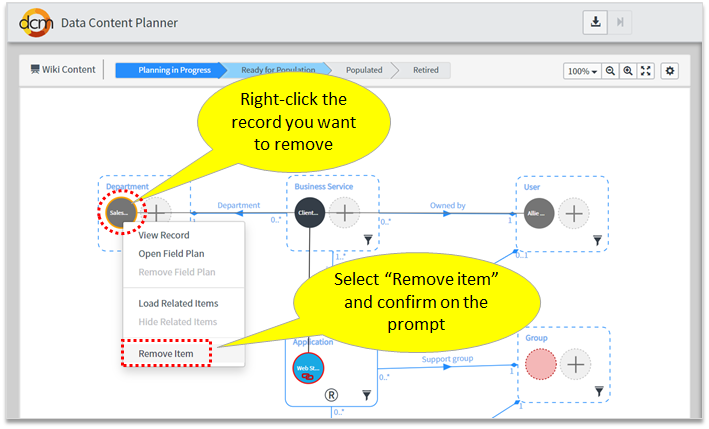
- Right-click a record or a link and select "Delete" from the context menu
Removing links from a content set
Removing links is a bit different than removing records since removing links can actually change or even delete existing data from the actual database. There are a couple of different scenarios when it comes to removing links:
- When a new link is created and later removed in a content set, nothing is really changed in the database
- When existing links are loaded into a content set and then removed, data will change on commit
- Depending on the link type, this can mean updating a reference field to an empty value or deleting a record from the relationship table between classes.
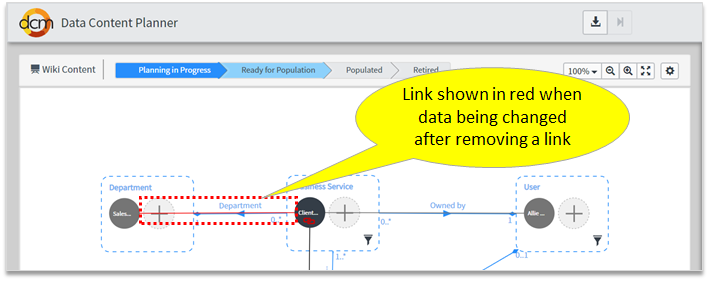
When data is actually being removed, the links will show in red before committing changes.
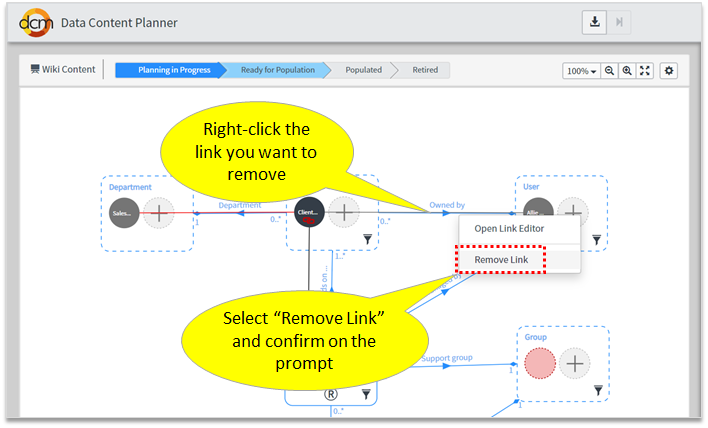
The actual removal of links is done in the same way as removing records. You can either select and click "delete" from the keyboard or right-click a link and select "Remove link" from the context menu.
Loading related records
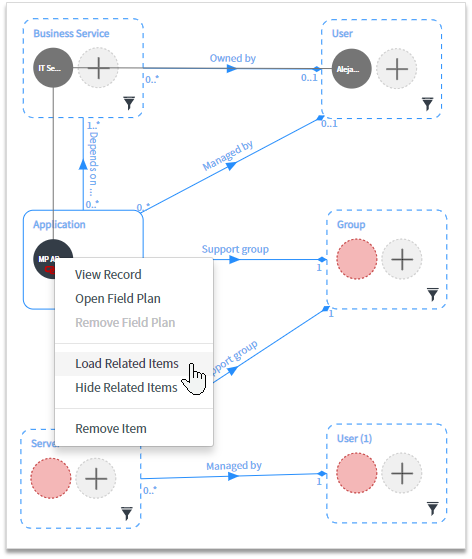
Since DCM R3.0 users have been able to load related records into Data Content Set for a selected record that is already part of the Content set.
When loading related records for a Root record, the whole structure is loaded at once. But when loading for a non-root record, only the first level of links is loaded. In both cases, loading the data will follow the Audit direction, meaning that only records along the audit direction will be loaded.
In the example Data Content Set (and blueprint) below:
- "Load Related Records" starting from Application record, has loaded a related Business Service and a User related to Business Service.
- If "Load Related Records" would be triggered from Business Service, it would only load Users according to the Audit direction of the Owned by reference.
- If "Load Related Records" is triggered from User, nothing is loaded, since all links are pointing towards User in terms of Audit direction.
Automatically loaded records are shown as gray circles. And clicking the "Hide Related Items" will remove the gray records from the content set.
Managing Field plans of records
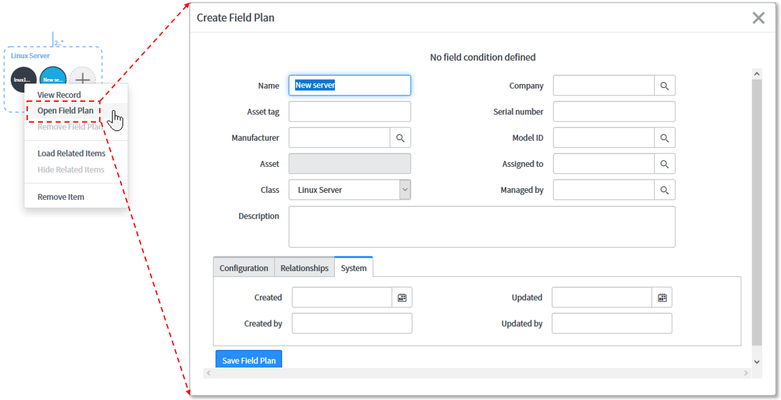
Users can create, modify and remove the field plan of a record by right-clicking the record and selecting the Open/Modify/Remove field plan functionality.
- The Desired record WITHOUT a Field plan will have a red border.
- The Desired record WITH a Field plan has a black border.
- And an actual record with Field plan has blue border indicating that record has been changed, since adding it to the content set.
Good to know
The Field Plan window is using the "Default view" of the form by default. If you want to define your own view used inside the Field plan, just create a new form view with the name "field_plan".
Editing Content Set details
Content sets have certain attributes that can be updated via the "Content set details" -form. This view can be opened from the "Edit details" button on the top right corner of the Data Content Planner.
The content set details to include attributes like:
- Name
- Description
- Owner and data analyst group
Canvas settings
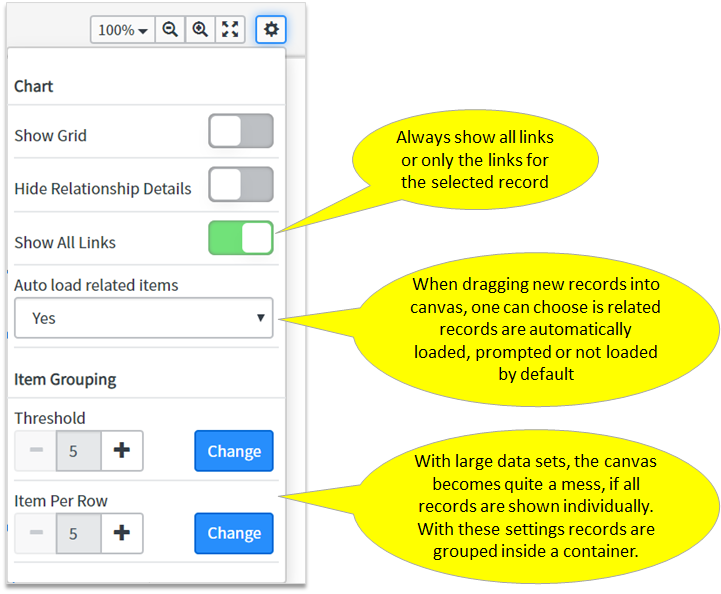
Canvas on the Data Content Planner has some useful settings related to how the records are shown on the canvas and how the planner works when loading new data.
The settings can be opened from a "gear" icon on the top right corner of the canvas area.
Settings can be used to:
- Show or hide the grid
- Show or hide relationship details
- Select if all links are always shown, or if only links for the selected record are shown
- Define what happens when new records are dragged to the canvas
- The "Auto-load related items" has three options
- Yes - Automatically load related items
- No - Do not load anything while dragging records
- Prompt - Ask if related records should be loaded this time or not
- Define item grouping
- With "Threshold", one can set a limit for individual records to show inside a container before grouping them
- And "Items per row" impact how the grouped records are shown when expanded
Data content set migration
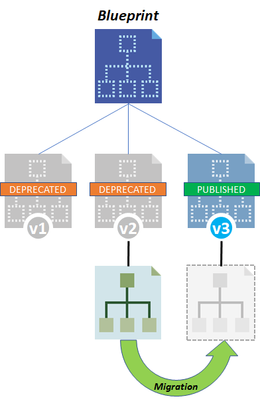
When new Blueprint version is created and published, DCM automatically turns the status of the previous versions to "Deprecated", which indicates for users that there is a newer version available.
A Data content set can be migrated from a deprecated blueprint version to the published version:
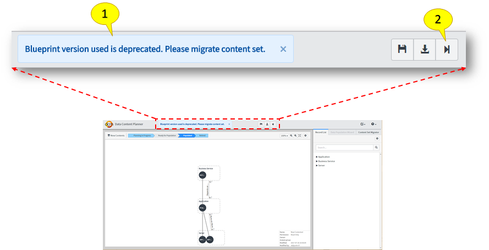
When a data content set is opened, a DCM notification indicates for a user that there is a new version available (1). Users can migrate a data content set by clicking the migration button in the toolbar (2).
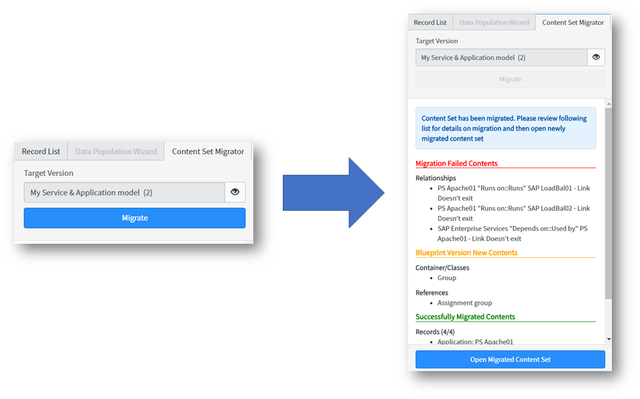
In the Content Set Migrator tab, the user can migrate the content set by choosing a target version and clicking migrate. After the migration, DCM shows the succeeded and failed migrations in the migration end report.
© Qualdatrix Ltd 2021 | All rights reserved.
